Tutorial: Using MX (Microscaling) with Quark#
Introduction#
In this tutorial, we will learn how to use MX datatypes with Quark.
MX is a new family of quantization datatypes defined by this specification and explored thoroughly in Microscaling Data Formats for Deep Learning
The key feature of MX is that it subdivides tensors into arbitrary blocks of elements that share a scale, instead of using a single per tensor scale like many other datatypes.
This allows for better accuracy with more fine-grained scaling while still reducing storage and computational requirements.
How to use MX in Quark#
1. Install Quark:#
Follow the steps in the installation guide.
2. Set the model:#
from transformers import AutoModelForCausalLM, AutoTokenizer
model = AutoModelForCausalLM.from_pretrained("meta-llama/Llama-2-7b", token=<hf_token>)
model.eval()
tokenizer = AutoTokenizer.from_pretrained("meta-llama/Llama-2-7b", token=<hf_token>)
We are retrieving the model from Hugging Face using their Transformers library.
The model meta-llama/Llama-2-7b is a gated model, meaning you will need to request access and generate a Hugging Face token.
You’ll need to replace all instances of <hf_token> with the token.
3. Set the quantization configuration:#
from quark.torch.quantization.config.type import Dtype, ScaleType, RoundType, QSchemeType
from quark.torch.quantization.config.config import Config, QuantizationSpec, QuantizationConfig
from quark.torch.quantization.observer.observer import PerBlockMXObserver
DEFAULT_MX_FP_8_PER_BLOCK = QuantizationSpec(dtype=Dtype.mx,
                                                mx_element_dtype=Dtype.fp8_e4m3
                                                observer_cls=PerBlockMXObserver, # for MX the observer_cls is always PerBlockMXObserver
                                                qscheme=QSchemeType.per_group, # for MX the qscheme is always QSchemeType.per_group
                                                is_dynamic=True, # this controls whether static or dynamic quantization is performed
                                                ch_axis=1,
                                                group_size=32
                                                )

DEFAULT_W_MX_FP8_PER_BLOCK_CONFIG = QuantizationConfig(weight=DEFAULT_MX_FP_8_PER_BLOCK)
quant_config = Config(global_quant_config=DEFAULT_W_MX_FP8_PER_BLOCK_CONFIG)
For MX quantization you need to not only set the dtype (Dtype.mx)
but you also need to set the mx_element_dtype to determine what
quantization is used by each tensor element.
The supported element types are: - FP8 (E4M3) - FP6 (E3M2 and E2M3) - FP4 (E2M1) - INT8
In terms of what element type to choose, according to Microscaling Data Formats for Deep Learning, INT8 can be used as a drop-in replacement for FP32 without any further work needed and FP8 is almost as good. However, FP6 and FP4 will generally require fine tuning and will incur a minor accuracy loss.
How is the tensor turned into blocks?#
Reshaping of the tensor into blocks is controlled by ch_axis and
group_size.
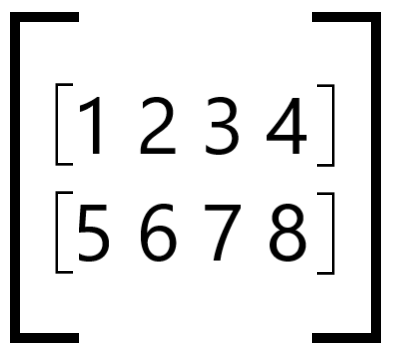
Let’s use a tensor of shape (2,4) as an example:
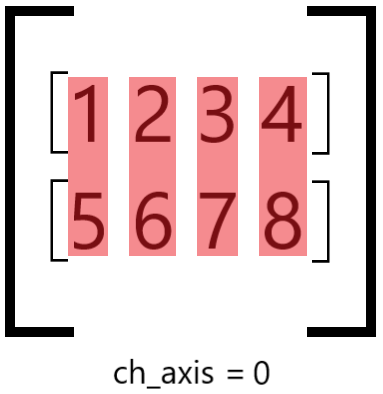
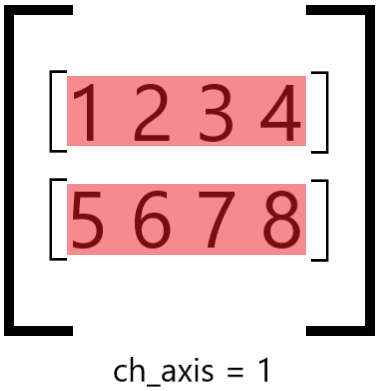
The parameter ch_axis determines along which axis we will group
elements into blocks:
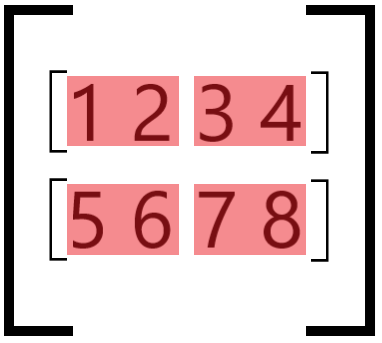
The group_size parameter determines how many elements to bunch
together into a single block.
If it is larger than the number of elements along the axis, the block is padded with zeros until it reaches the correct size:

If the group_size is less than the number of elements, the axis is
broken up into block tiles:
Each block will have its own scale value.
4. Set up the calibration data (this is required for weight only and dynamic quantization as well):#
from torch.utils.data import DataLoader
text = "Hello, how are you?"
tokenized_outputs = tokenizer(text, return_tensors="pt")
calib_dataloader = DataLoader(tokenized_outputs['input_ids'])
If you are using static quantization, make sure the tensor shape of the calibration data matches the shape of the data you intend to use with the model!
5. Apply the quantization:#
from quark.torch import ModelQuantizer
quantizer = ModelQuantizer(quant_config)
quant_model = quantizer.quantize_model(model, calib_dataloader)
This step will calculate the block scales, apply them to the element values and perform quantization to whatever element datatype you have selected.
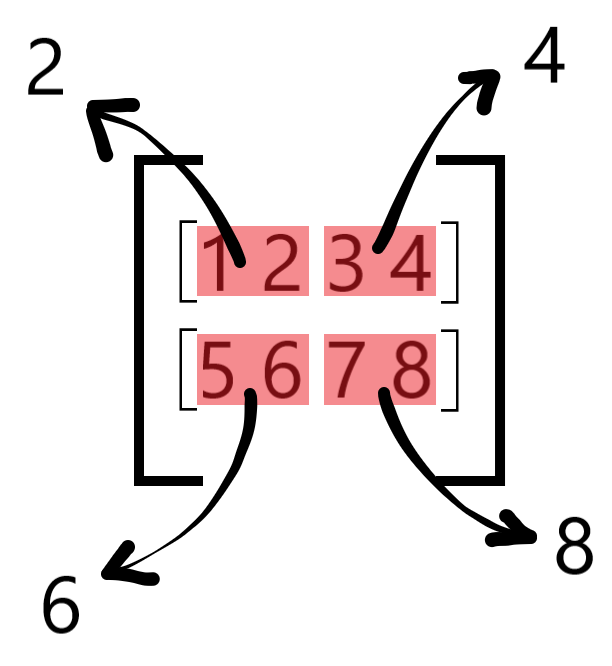
How are the scales calculated?#
You calculate the maximum absolute value for every block:
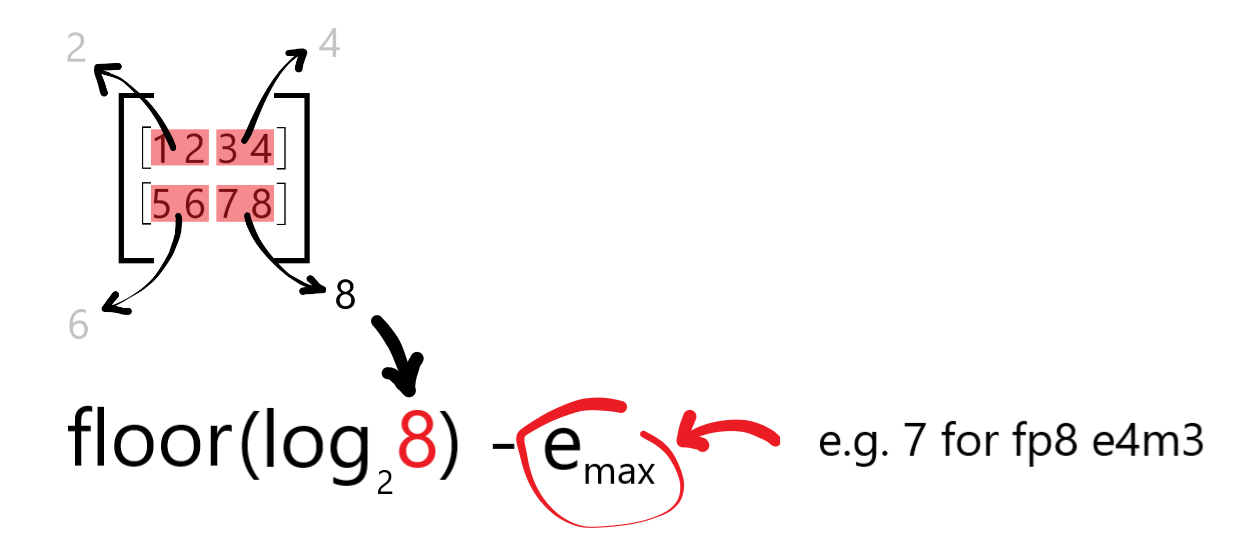
Then using this value you calculate the shared exponent by:
Getting its log2 value,
Rounding it down to the nearest integer power and
Subtracting the maximum exponent value the chosen element datatype can represent.
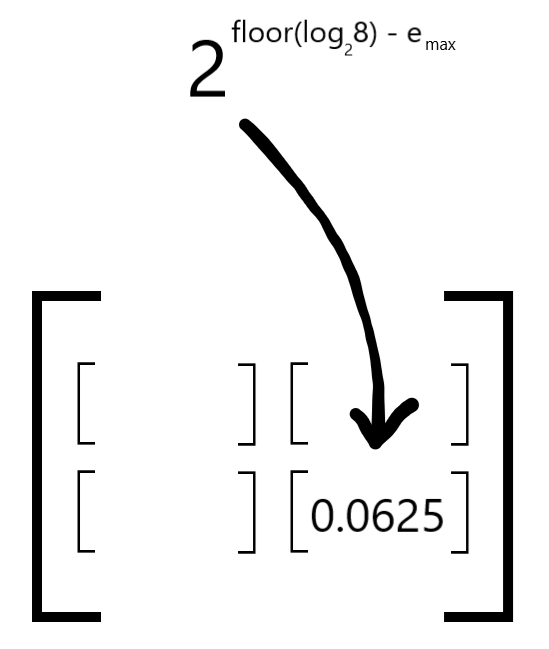
Finally, you raise 2 to the power of the shared exponent and you have the scale:
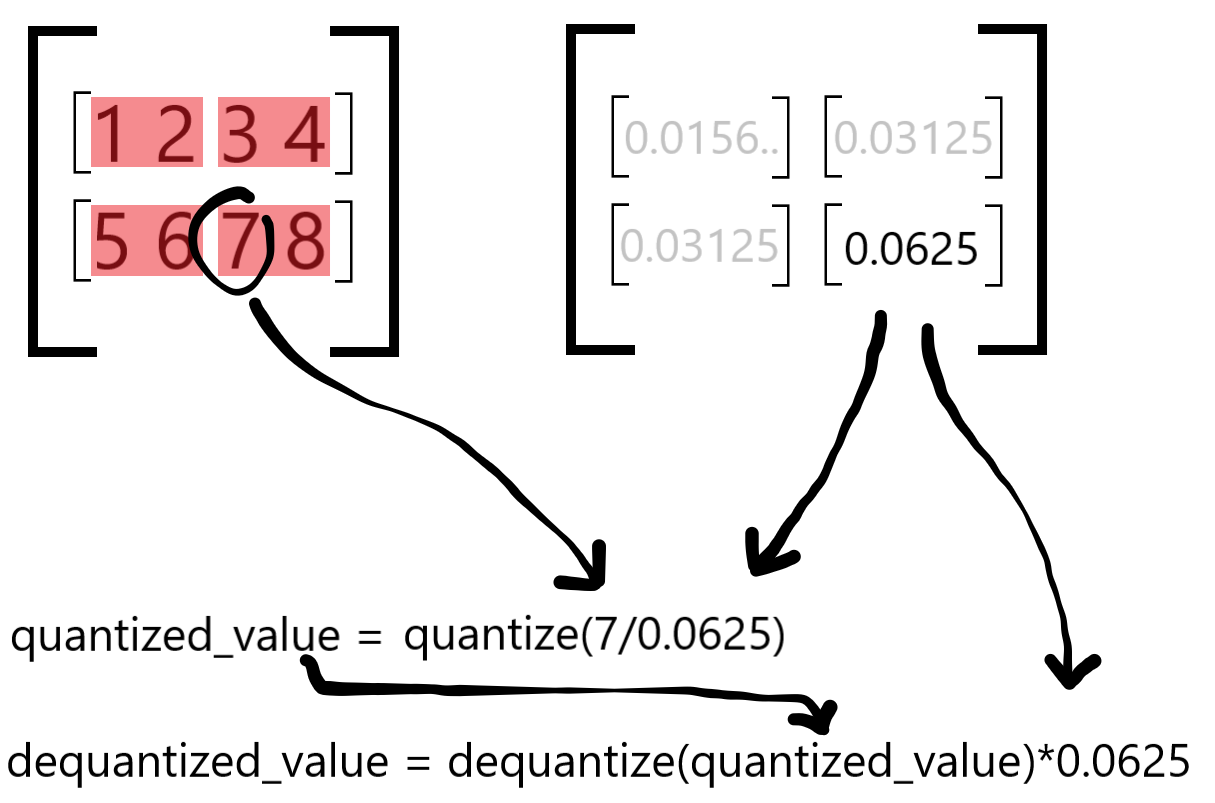
How are the scales used?
Conclusion#
Congratulations, if you’ve done all of the above, you should now have a model quantized with MX datatypes that you can perform inference with.
You should also hopefully have a better understanding of what MX actually means and why you might want to use it.